


In this article I’ll describe how to set up an ASP.NET Core web API project with multiple versions, automatic generation of multiple OpenAPI specifications with NSwag and uploading them to Azure API Management.
Our sample service will expose two different API versions under the routes /api/v1 and /api/v2. So conceptually there is a service version (e.g. v1.6) and multiple API versions (e.g. v1.8 and v2.1). Only the major API version is exposed in the URL. The URL only contains and changes for major versions because minor versions are not breaking (see semver) and thus we don’t need to introduce and expose a new version.
Two remarks:
- For simplicity you could use the latest API version (v2.1) as the service version.
- To maintain backwards compatibility with older consumers we need to serve multiple versions simultaneously - at least two to be able to do gradual migrations without service interruptions.
In our setup, each major version will produce an OpenAPI specification which is served in the Swagger UI for testing and also generated at build time as local OpenAPI JSON specification files. This file generation is very useful to review the public API changes in Pull Requests (when committed to the repository) and to upload to Azure API Management in the CD pipeline later when the service is deployed.
There is one caveat though: By default the paths in the specifications are relative to the root URL of the service, i.e. in both specs the operation paths start with /api/v.... The problem is that Azure API Management does not support two APIs with the same external URL and then route a request to the correct API based on the operations in the specs, i.e it cannot choose the correct API based on the full URL. That’s why we need to remove the path prefixes in the specs (e.g. remove /api/v1) and use this prefix as the base path of the Azure API Management API base URL.
To clarify this:
- The service is served under
https://myurl.com(heremyurl.comis served by Azure API Management) - The API v1 is served under
https://myurl.com/api/v1(using the route/api/v1in the ASP.NET Core application internally) - The Azure API Management API backend URL must be
https://myurl.com/api/v1(and nothttps://myurl.com) so that a request can clearly be correlated to a single APIM API and backend server URL - And thus the API v1 specification which is uploaded to APIM must not contain operations with
/api/v1
Setup the ASP.NET Core application
All the sample code can be found in this repository.
First we will create a new project where we enable API versioning in the Startup.cs with versioning in the path:
public void ConfigureServices(IServiceCollection services)
{
    ...

    services
        .AddApiVersioning(options =>
        {
            options.ReportApiVersions = true;
            options.AssumeDefaultVersionWhenUnspecified = false;
            options.DefaultApiVersion = new ApiVersion(1, 0);
            options.ApiVersionReader = new UrlSegmentApiVersionReader();
        })
        .AddVersionedApiExplorer(options =>
        {
            options.DefaultApiVersion = new ApiVersion(1, 0);
            options.GroupNameFormat = "'v'VVV";
            options.SubstituteApiVersionInUrl = true;
        });
After versioning is set up we also register two OpenAPI documents - one for each major version (using NSwag):
public void ConfigureServices(IServiceCollection services)
{
    ...

    var versions = new[]
    {
        // Here you can control the minor version of each supported major version
        new Version(2, 1),
        new Version(1, 8)
    };

    foreach (var version in versions)
    {
        services.AddOpenApiDocument(options =>
        {
            options.Title = "Product Service";
            options.Description = "Manages products and their metadata.";

            options.DocumentName = "v" + version.Major;
            options.ApiGroupNames = new string[] { "v" + version.Major };
            options.Version = version.Major + "." + version.Minor;

            // Patch document for Azure API Management
            options.AllowReferencesWithProperties = true;
            options.PostProcess = document =>
            {
                var prefix = "/api/v" + version.Major;
                foreach (var pair in document.Paths.ToArray())
                {
                    document.Paths.Remove(pair.Key);
                    document.Paths[pair.Key.Substring(prefix.Length)] = pair.Value;
                }
            };
        });
    }
}
Note: To avoid problems with $ref handling in Azure API Management we need to enable allowReferencesWithProperties so that $refs are inlined and not described with oneOf structures. If you do not need to import the specs into Azure API Management I recommend to not patch the operation paths and server URL and leave them as is (relative to the hosted URL).
Because we patched the operation paths for Azure API Management, we need to add the removed prefix to the server URL so that the served Swagger UI still works:
public void Configure(IApplicationBuilder app, IWebHostEnvironment env)
{
    ...

    app.UseSwaggerUi3();
    app.UseOpenApi(options =>
    {
        options.PostProcess = (document, request) =>
        {
            // Patch server URL for Swagger UI
            var prefix = "/api/v" + document.Info.Version.Split('.')[0];
            document.Servers.First().Url += prefix;
        };
    });

    ...
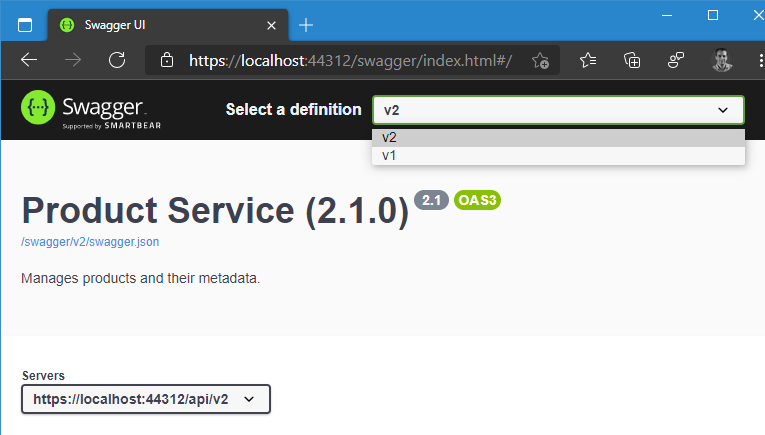
If you now start the project and navigate to /swagger you should be able to switch between the versions in the dropdown:
As this is working we will now add the NSwag.MSBuild package to the project to generate the specs at build time as files. For that we need to create two NSwag configuration files, nswag_v1.json and nswag_v2.json (only v1 is shown):
{
  ...
  "documentGenerator": {
    "aspNetCoreToOpenApi": {
      "project": "ProductService.csproj",
      "documentName": "v1",
      "output": "openapi_v1.json",
      ...
    }
  }
}
In the ProductService.csproj file we now need to run NSwag so that the OpenAPI JSON files are automatically generated on build:
<Project Sdk="Microsoft.NET.Sdk.Web">
  ...
  <Target Name="NSwag" AfterTargets="Build">
    <Exec Command="$(NSwagExe_Core31) run nswag_v1.json /variables:Configuration=$(Configuration)" />
    <Exec Command="$(NSwagExe_Core31) run nswag_v2.json /variables:Configuration=$(Configuration)" />
  </Target>
</Project>
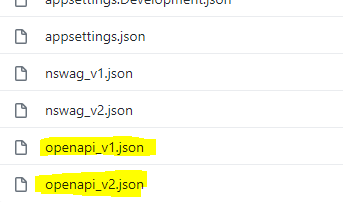
After building the solution you should see the two specs generated:
In your CI build you can now add these two specs to the CI artifacts and then in your CD pipeline (release) you can pick them up and upload to Azure API Management.
Upload the specs to Azure API Management
Assuming you have one Azure API Management instance per environment, we can now run the following script in the CD pipeline to create an API Version Set with the v1 and v2 APIs:
$ApiMgmtContext = New-AzApiManagementContext -ResourceGroupName "Namotion" -ServiceName "NamotionApim"

$VersionSet = New-AzApiManagementApiVersionSet `
    -Context $ApiMgmtContext `
    -Name "Product Service API" `
    -Description "The Product Service API." `
    -Scheme Segment

Import-AzApiManagementApi `
    -Context $ApiMgmtContext `
    -ApiVersionSetId $VersionSet.ApiVersionSetId `
    -ApiId "product-server-api-v1" `
    -Path "products" `
    -ServiceUrl "https://internal.products.myurl.com/api" `
    -ApiVersion "v1" `
    -SpecificationFormat "OpenApiJson" `
    -SpecificationPath "./openapi_v1.json"

Import-AzApiManagementApi `
    -Context $ApiMgmtContext `
    -ApiVersionSetId $VersionSet.ApiVersionSetId `
    -ApiId "product-server-api-v2" `
    -Path "products" `
    -ServiceUrl "https://internal.products.myurl.com/api" `
    -ApiVersion "v2" `
    -SpecificationFormat "OpenApiJson" `
    -SpecificationPath "./openapi_v2.json"
Note: If you have a single Azure API Management instance for multiple environments, then you need to add the environment name to the version set’s -Name (e.g. Product Service API (Dev)) and API’s -ApiId parameters (e.g. product-server-api-v2-dev).
As you can see in this sample, you should deploy your service to https://internal.products.myurl.com so that the API v1 is hosted on https://internal.products.myurl.com/api/v1. We add the /api to the ServiceUrl so that the API Version name only contains v1.
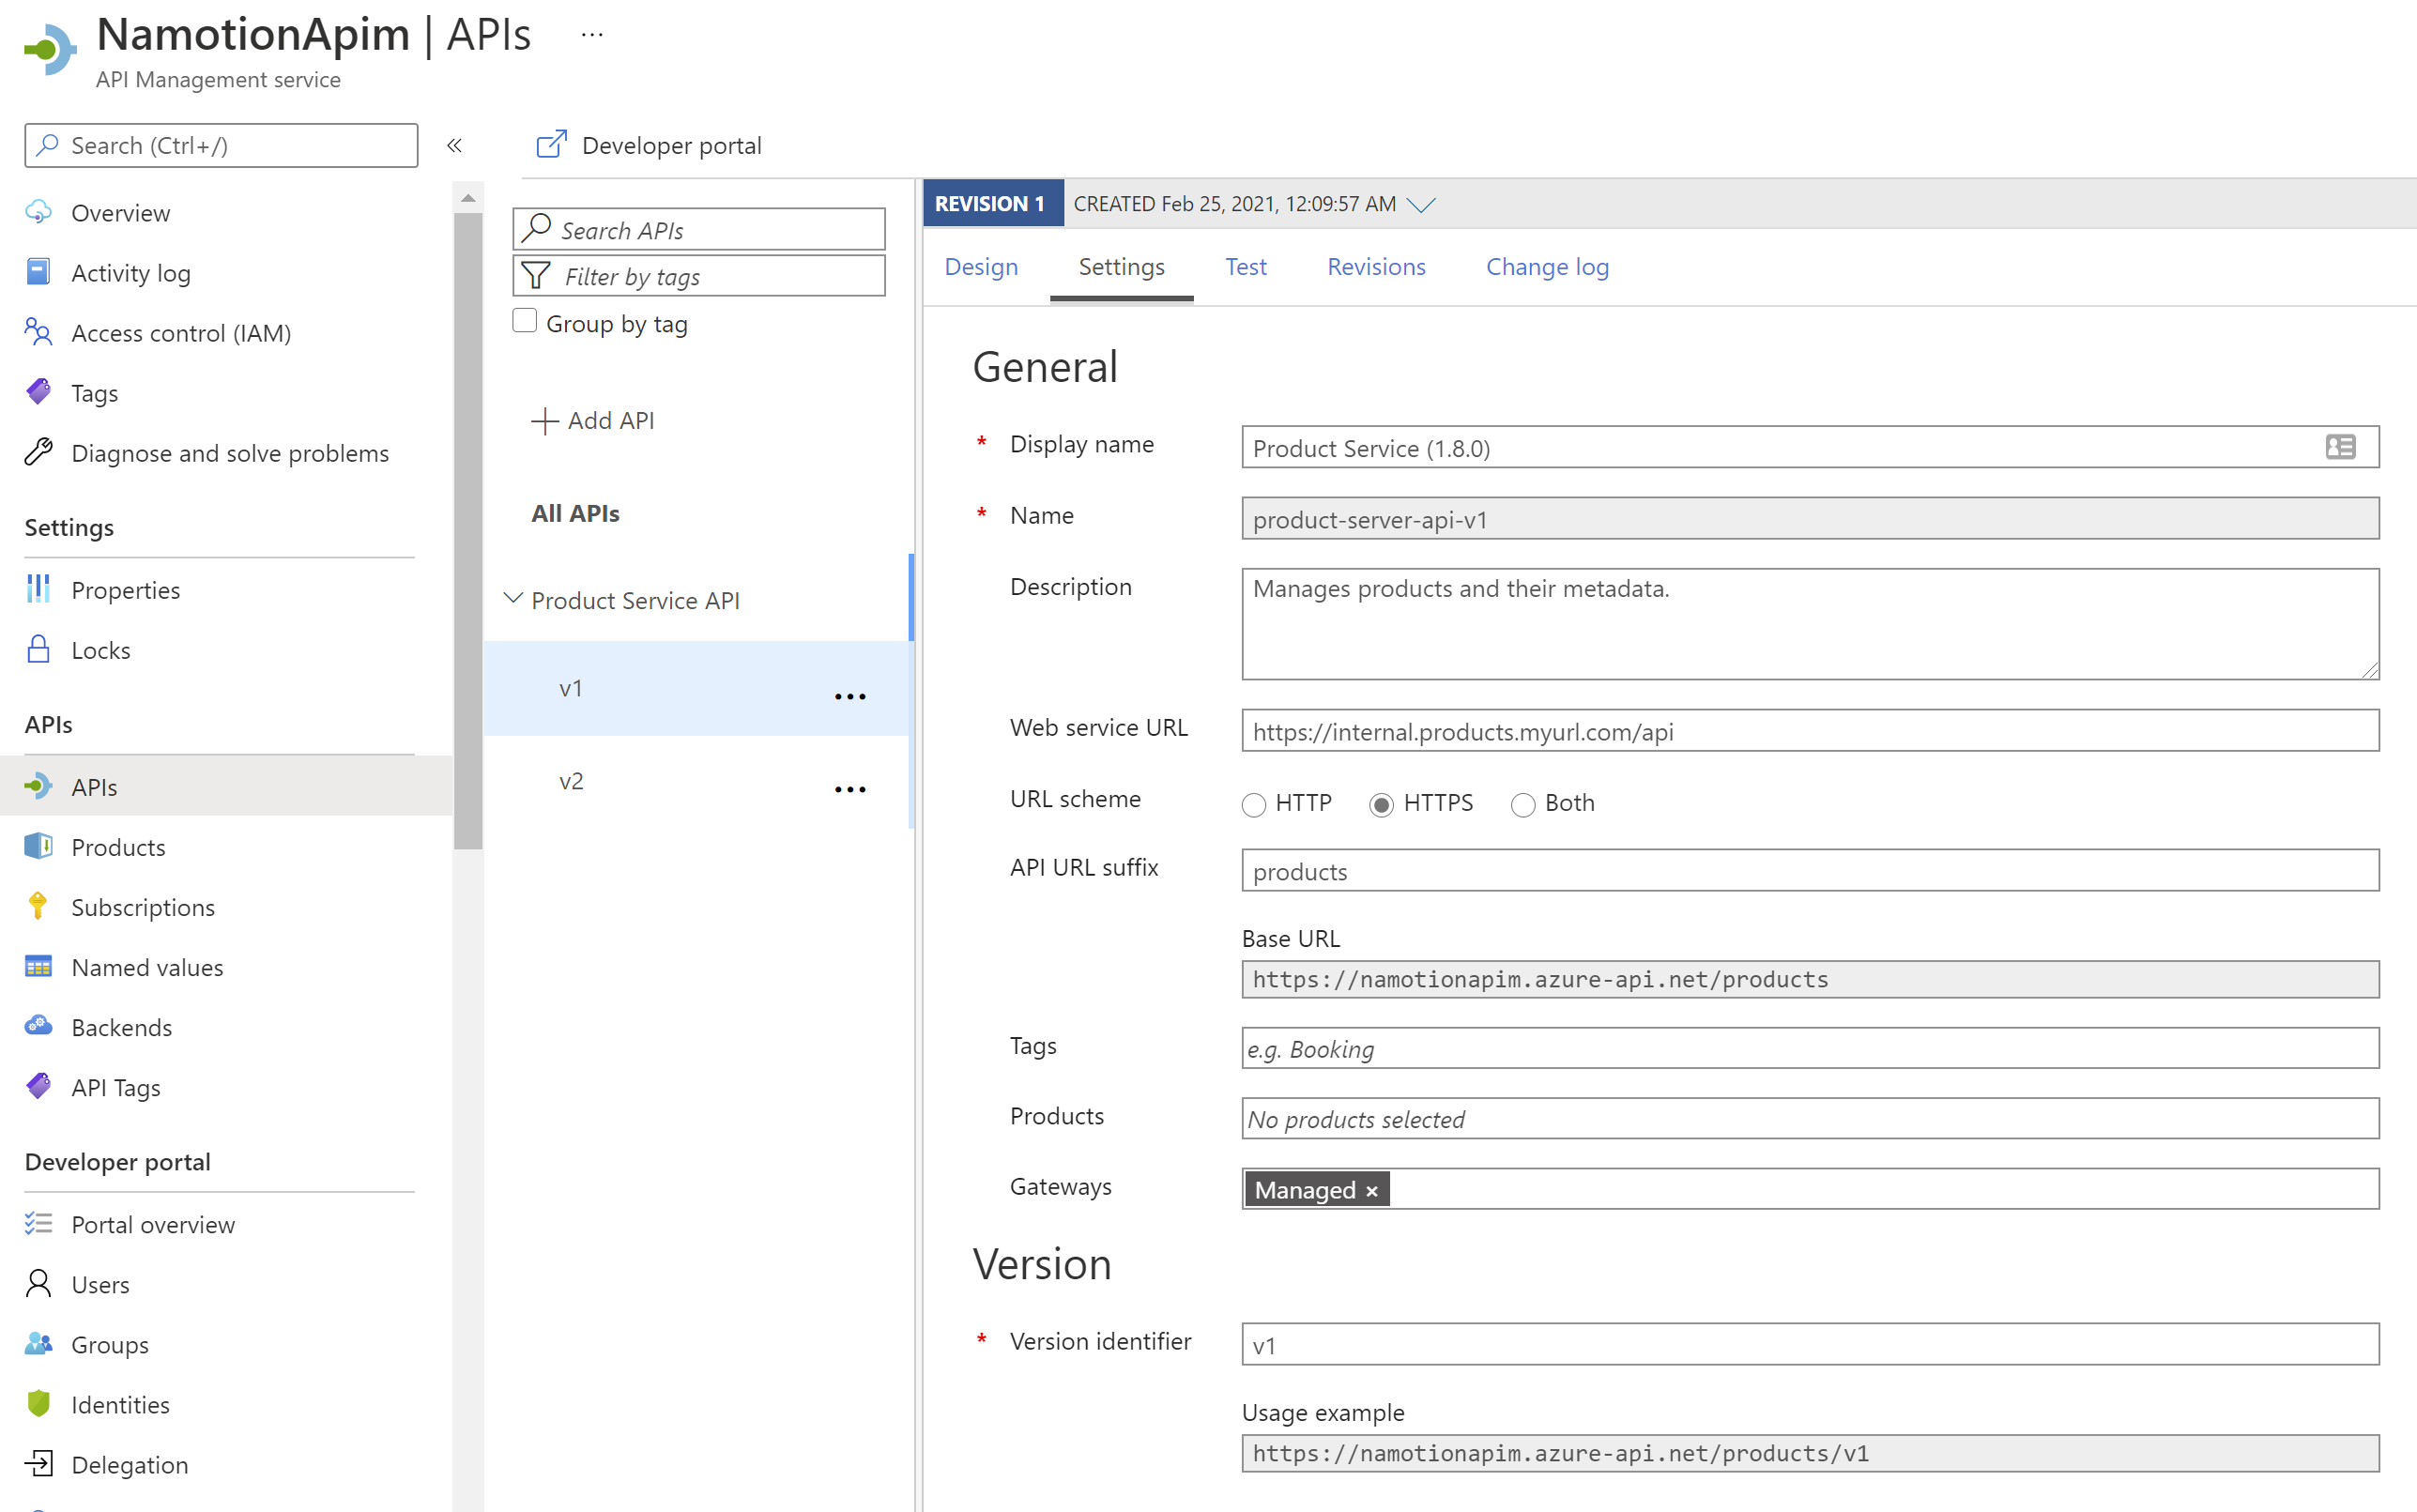
After running this script you should see the following API hierarchy in the Azure API Management instance:
Track the API versions in Apimundo
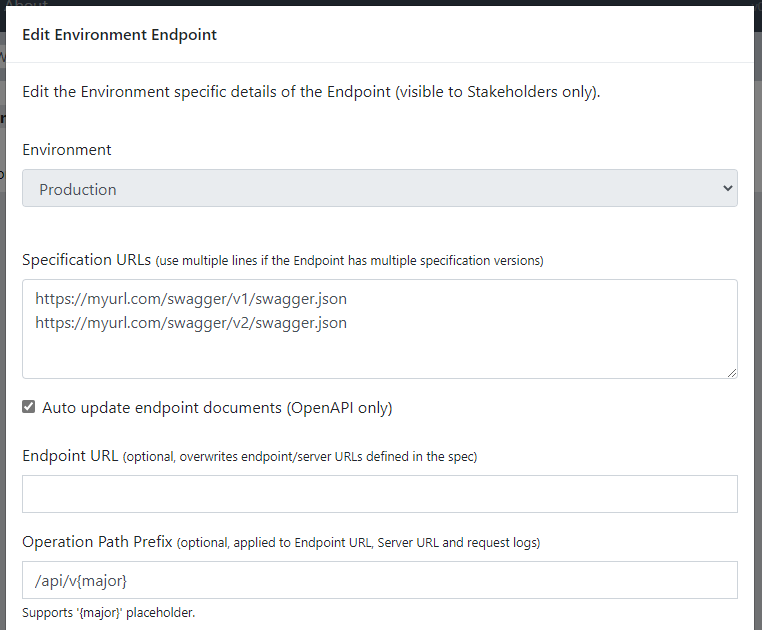
Apimundo is an architecture and service API documentation system which can automatically track, document and compare web API interfaces with OpenAPI specs. After creating a new OpenAPI Endpoint, you can easily register multiple specification endpoints and add the prefix like this:
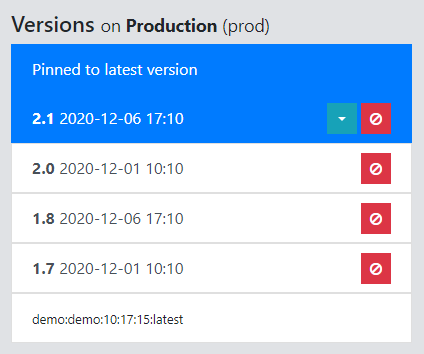
After the system automatically indexes your specs (might take some minutes) you can see a single list of API versions where each major version can progress individually with new minor versions:
The final result can be played with here (Demo).
Rico Suter
SOFTWARE ENGINEERING
EDIT
ASP.NET Core .NET .NET Core OpenAPI NSwag Azure API Management Apimundo