


In this tutorial we will:
- Step 1: Build an ASP.NET Core app and push the sources to a Git repository
- Step 2: Setup the required Azure resources (Web App for Containers, etc.)
- Step 3: Setup an Azure DevOps CI build which builds a Docker image and pushes it to a private Azure Container registry (ACR)
- Step 4: Create an Azure DevOps release pipeline which deploys the new Docker image to a Linux based Web App for Containers (App Service)
Important: The tutorial is using the name DockerDemo for the demo project and Azure resources. It is recommended to use a new name for your sample app, because the name DockerDemo is now in use and cannot be used for new Azure resources.
Step 1: Create an ASP.NET Core project
In this step we will implement an ASP.NET Core sample app, add the Azure DevOps YAML build scripts and push everything to a Git repository. The sample app and build script can ge found on GitHub/RSuter/DockerDemo. You can skip this part of the tutorial and directly use this public repository.
To manually create the app and build script, follow these steps:
- Create a new directory for your new repository
- Create a new ASP.NET Core project (with Linux Docker support) in the
srcdirectory -
In the root of the repository, add the YAML build script
azure-pipelines.yml:pool: vmImage: 'Ubuntu 16.04' variables: imageName: 'docker-demo:$(Build.BuildId)' steps: - script: docker build -f DockerDemo/Dockerfile -t $(dockerId).azurecr.io/$(imageName) . workingDirectory: src/ displayName: 'Docker Build' - script: | docker login -u $(dockerId) -p $pswd $(dockerId).azurecr.io docker push $(dockerId).azurecr.io/$(imageName) env: pswd: $(dockerPassword) workingDirectory: src/ displayName: 'Docker Push'This Azure DevOps YAML build script will build the Dockerfile in
src/DockerDemoand push it to the Container registry tagged with current build id. Because the CI build triggers a release with the same build id, the build pipeline is able to deploy this exact version. It is common practice to build a docker image only once and deploy it to all the different environments. -
Your file structure and solution should now look as follows:
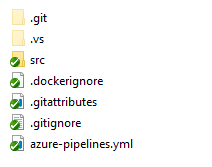
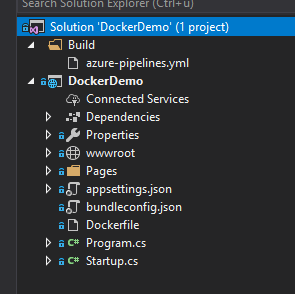
- Commit all your files and push the repository to your Azure DevOps project’s repository.
Step 2: Create the Azure Resources
In the second step, we will setup all required Azure resources: A Container registry, a Web App for Containers and its service plan:
- Browse to the Azure Portal
- Create a new resource group with the name
DockerDemo - Create a new Azure Container Registry called
DockerDemoContainerRegistry- In the “Access keys” section, enable admin user so that a registry password is generated
- Create a new Web App for Containers (Linux) resource with the name
DockerDemoAppServiceand a new App Service Plan calledDockerDemoAppServicePlan
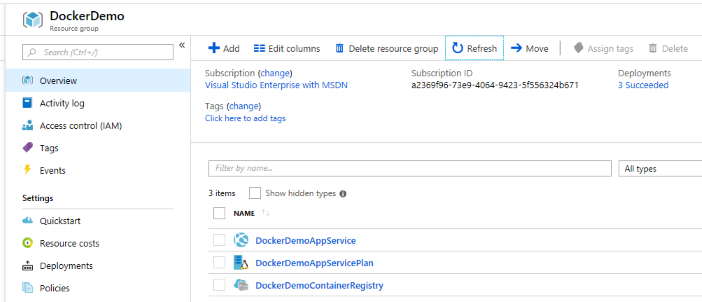
After these steps, you should end up with a resource group with the following resources:
Step 3: Create the build definition
Now, we will setup the build definition in Azure DevOps:
- Browse to your Azure DevOps project, navigate to Pipelines/Build and create a new build pipeline
-
Select your repository: The UI should automatically select your
azure-pipelines.ymlfile: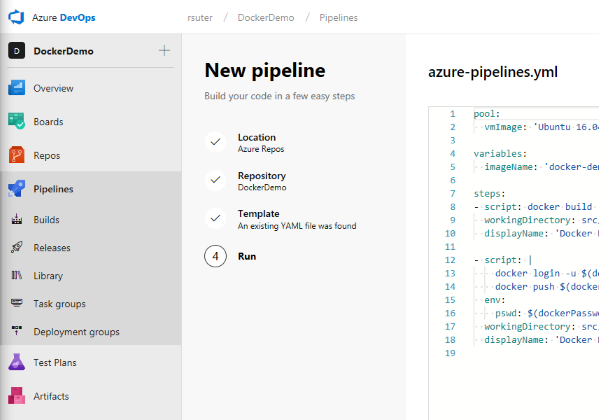
-
After creating the build definition, add the following build variables so that the script can successfully run:
dockerId: The name of the “Container registry” (without azurecr.io, e.g.dockerdemocontainerregistry)dockerPassword: The registry password which can be found in the Azure Portal by opening the “Container registry” resource and retrieving the password under “Access keys”
-
Now, you can run a build against your repository and the Container registry should be populated with a new image called
docker-demowith the tag set to the current build id:
Step 4: Create the release pipeline
In this step, we will create a new release pipeline which is triggered by a successful build.
Limitation: At the moment, the Azure App Service task only supports deploying a single Docker image to the App Service. I think more tasks to deploy “image groups” via Docker Compose or Kubernetes will be supported soon.
- Create a new release pipeline
-
Select the artifact from your build definition and enable the continuous deployment trigger:
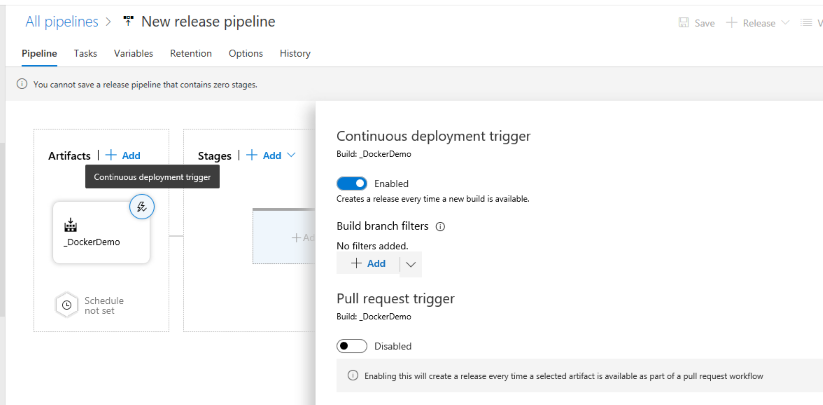
-
Create a new “Azure App Service deployment”
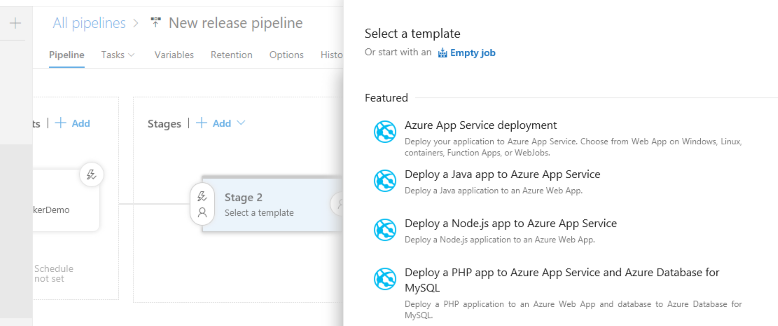
-
Click on the first stage and create a new “Azure App Service deployment”
-
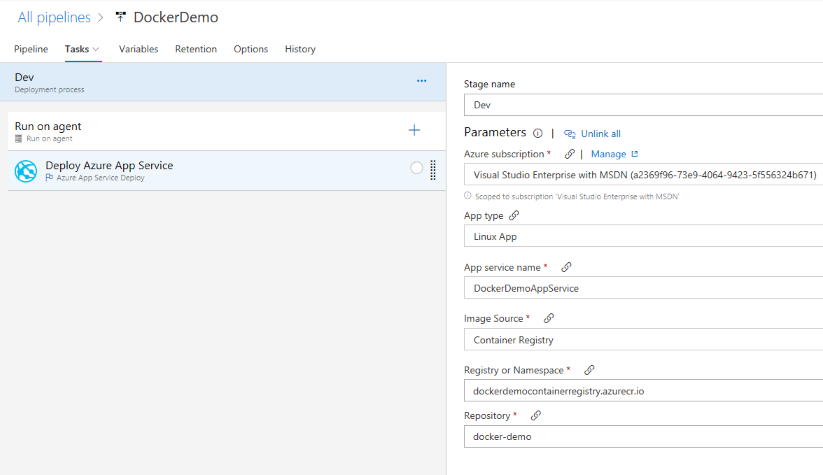
Prepare the newly created stage/environment:
- Select a subscription and the app service name
- Set the “App type” to “Linux app”
- In “Image Source” select “Container Registry”
- Enter the registry address and select the image
docker-demo
-
Edit the “Deploy Azure App Service” task:
- Use
$(Build.BuildId)as “Tag” so that the correct Docker image version from the associated CI build is deployed
- Use
Now, if you commit a change to your Git repository, a new CI build is triggered, a new image version is pushed and eventually a new release is created. This release will update the used image tag in the App Service which will trigger the actual image deployment.
Rico Suter
SOFTWARE ENGINEERING
EDIT
App Service ASP.NET Core Azure Container Azure DevOps Docker Microservices Web App